Showing posts with label free attern. Show all posts

Brighten My Day Medallion

Best Blog Tips
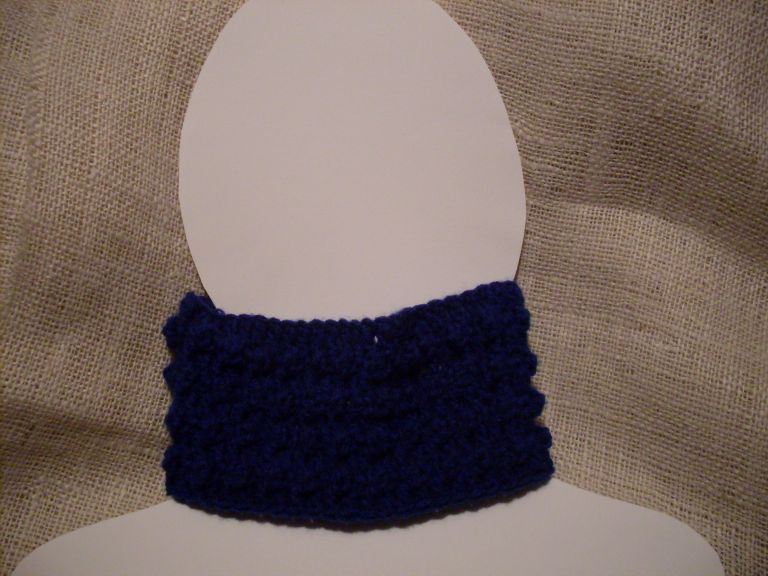
This is a very easy but pretty medallion. You can use it for a shawl, for an afghan, for a lined tote bag, even for a scarf!

Size of medallion is 4 3/4"


Materials:

Red Heart worsted weight yarn Rainbow Brights

Crochet hook size H

Ch 5, sl st to join rnd.
Rnd 1- Ch 3, make 16 dc in chain. Sl st to join rnd, skipping beginning ch 3.
Rnd 2- Ch 3, 3 dc in next dc, ch 3, skip 2 dc, *4 dc in next dc, ch 3, skip 2 dc, rep from * 3 times. Ch 3, skip 2 dc, 4 dc in next dc, ch 3, 4 dc in next dc, ch 3, sl st to
join rnd. Rnd 3- Ch 3, 1 dc in each of next 3 dc, ch 3, 1 sc in ch-3 sp, ch 3, *1 dc in each of next 4 dc, ch 3, 1 sc in ch-3 sp, ch 3, rep from * around. Sl st to join rnd.
Done!

Bible Promises For YOU!

Best Blog Tips

Pretty Granny Square Motif

Best Blog Tips

I think that there are never too many stitches, squares or motifs for a crocheter to have at hand. You can use them for so many things!
Here's a pretty version of the age-old favorite granny I came up with while tinkering with my hook.

Materials:
Worsted weight yarn of your choice
Size H crochet hook


Ch 5. Sl st to join into a ring. Ch 1. Rnd 1- Make 12 sc in ring, sl st to join the beg sc. Rnd 2- Ch 5, 1 sc in next sc, 1 sc in each of next 2 sc (corner made), *ch 5, 1 sc in next sc, 1 sc in each of next 2 sc, rep from * around. (4 corners made).
Rnd 3- Sl st until you reach the first of the ch5- corner loops, ch 3, 3 dc, *ch 4, 4 dc in that loop, ch 2, 4 dc, ch 4, 4 dc in next ch-5 loop, ch 2, rep from * around.
Rnd 4- Sl st until you reach the first ch 4-loop, make ch 3, 2 dc, ch 3, 3 dc in that loop. *Ch 3, 1 sc in the 3rd dc of the 2nd shell of corner shells, ch 5, skip unto the 1st corner shell of next corner and sc in 4th dc of shell, ch 3, make 3 dc, ch 3, 3 dc in that ch-5 loop, rep from * around, until you reach the beginning ch-3, sl st to end row. Rnd 5- Ch 3, 1 dc in each of next 2 dc, 2 dc in ch 2, 2 dc in loop, 1 dc in each of next 3 dc, ch 4, 1 sc in 5th ch of ch-5 loop, ch 4, 1 dc in each of next 3 dc, in next loop make 2 dc, ch 2, 2 dc, 1 dc in each of next 3 dc, ch 4, 1 sc in 5th ch of ch-5 loop, ch 4, 1 dc in each of next 3 dc, 2 dc, ch 2, 2 dc in loop, 1 dc in each of next 3 dc, ch 4, 1 sc in 5th ch of ch-5 loop, repeat around, sl st in beginning ch 3.
Fasten off. Weave in tail.
Motif completed!


Note: IMPORTANT, PLEASE READ- I trust you guys, but every now and then, I must remind you that I post my own patterns, that they are the property of Craftybegonia. They are for your personal use only and you must not post them anywhere without my express consent and knowledge. You may not attribute the patterns to yourself and may not copy and sell them anywhere.
If you desire to use any of my patterns to sell items made from them, you must obtain my permission first. If you wish to use any of my patterns for a class or crochet group, let me know in advance (I have given my permission for that in the past.) If you wish to use them for charity, I'd be thrilled!
Some of you have expresed that you would like to be able to contact me when you run into some difficulty with a pattern. I try to take a look at the comments posted, so you can contact me that way. (No SPAM, please!) Thank you so much, you guys are a joy!

Read FREE Online!
Amazing Wonders of Creation


Craftybegonia...because handmade is special!
I work with my hands what comes out of my heart.
Best Blog Tips

Aruba Star

Best Blog Tips


This is a very easy but pretty good looking motif which you can use for many things or simply turn into a coaster.
Hope you enjoy it.
Materials:
Red Heart worsted weight yarn Aruba Sea
Crochet hook size H
With Aruba Sea and H size crochet hook, ch 2.
Rnd 1- Make 6 sc in 2nd ch from hook. Slip st to join rnd.
Rnd 2- Ch 3, 1 dc in same spot as ch 3, ch1, make 2 dc in next sc, ch 1, *2 dc in next sc, ch 1, rep from * around, slip st to join rnd.
Rnd 3- Slip st until you reach next ch-1 space, ch 8, skip next 2 dc, make 1 dc in next ch-1 space, *ch 5, skip next 2dc and make 1 dc in next ch-1 space, rep from * around. Slip stitch to 3rd chain of beginning ch 8.
Rnd 4- Slip stitch until you reach the first ch-5 space, ch 3, make 3 dc ch 1, 4 dc in that space, 4 dc, ch 1, *4 dc in next ch-5 space, rep from * around, slip st to beg ch-3 to end round.
Rnd 5- Slip stitch until you reach the first ch-1 space between the first group of 8 dc, slip stitch and ch 3, 2 dc, ch 3, 3 dc in that same space,ch 3, skip 4 dc, 1 sc in space before you reach the next dc, ch 3, skip 4 dc,
*3 dc, ch 3, 3 dc in next ch-1 space in the middle of 8-dc cluster, ch 3, skip next 4 dc, 1 sc in space before you reach next 4 dc, ch 3, skip next 4 dc, 3 dc, ch 3, 3 dc in next ch-1 space, rep from * around. End rnd with a sl st in beg ch-3.
Done!


Read FREE Online!
Assurance
Best Blog Tips

Stylish Neckie

Best Blog Tips

I love combo pieces, those that you can wear in different ways are really nice. Here's another one of those! This pretty neckie is softly textured to lend it interest and a bit lacy so that it won't be stiff around your neck. The beauty of it is that you can wear it only buttoned at the top and opened at the bottom as a neckie or you can close it all up and wear it as a gentle cowl. This easy and attractive pattern is also relatively fast to make!

Materials Red Heart worsted weight yarn Dusty Green
Crochet hook size H
Blunt needle
scissors
4 Buttons of your choice of a size that can easily go between dc stitches
Sewing needle
Sewing thread matching the yarn color of the neckie


Note- Ch 3 counts as 1 dc and ch 2 counts as 1 hdc throughout.

With Dusty Green and H hook, ch 52.
Row 1- 1 dc in 4th ch from hook and in each ch across.(50 sts).
Row 2- Ch 3, turn. 1 dc in next dc. ch 1, 1 dc in each of next 2 dc, ch 1, *1 dc in each of next 2 dc, ch 1, rep from * across. Ch 3, turn. Row 3- Rep row 2. Ch 2, turn. Row 4- 1tr in next dc, 1 sc in ch-1 space, *1 hdc in next dc, 1 tr in next dc, 1 sc in next ch-1 space, rep from * across. Rows 5 to 6- Rep row 2. Row 7- Rep row 4. Row 8- Rep row 4. Row 9- Rep row 5.


Row 10- Turn the neckie sidewise and sc across the narrow edge of it. Row 11- Rep row 10. Row 12- Ch 3, make 3 dc in same spot as ch 3, skip 2 sc, make 4 dc in next sc, skip 2 sc, make 4 dc in next sc, rep across. End row with 1 sc in last stitch. Fasten off.
Rows 13 to 15- Turn the neckie on its edge at opposite end and make 2 rows of sc for buttonband. Fasten off. Weave in tails.
Sew buttons on side opposite shell edging. Use the space in between the first 2 dc in each shell to slide in button.
FREE Online Bible Lessons:
http://alturl.com/q4r4
Best Blog Tips

Spiky Little Neck Warmer

Best Blog Tips


This is another convertible piece for your cool Season wear. This contemporary neckwarmer is textured and nice and it works up really fast! It is really fun and I decided to show it in all the ways that you can wear it. It converts from a neck warmer into a neckie and back. Make it in your favorite color and let me know how you liked it.


Materials:
Worsted weight blue yarn
Crochet hook size H
4 shirt-size buttons mathing yarn (which would go easily thorugh dc sts)
blunt needle
scissors
Ch 49 with Blue and H hook.
Row 1- 1 dc in 4th chain from hook and in each ch across. (47 dc).
Row 2- 1 dc in each of next 3 dc, 1 hdc in next dc, 1 tr in next dc, 1 sc in next dc, *1 tr in next dc, 1 sc in next dc, rep from * across, stopping this stitch 6 sts from end of row. Now, proceed as follows: 1 hdc, 1 dc in next dc and in each dc to end of row. Ch 3, turn. Row 3-1 dc in each st across. Row 4- Rep row 2. Row 5- Rep row 3.


Continue alternating these two rows until you have completed 9 rows, ending with a dc row. Fasten off, weave in tails.
Make a shell trim for buttonholes as follows: Join yarn to the narrow edge of the neck warmer, ch 3, make 2 dc in same spot as ch 3, skip a little space, make 1 sc, skip a little space, make shell of 4 dc in next space, *skip a little space across and make 1 sc, skip a little bit, eyeballing it and make a shell of 4 dc, rep from * across. Fasten off and weave in tail. Sew 4 buttons on the opposite narrow edge of the neck warmer which will use these shells as buttonholes (you could do 5 if you wanted, because you are going to wind up with 5 shells, but I left the middle one without a button and it wourld out really well, choose a size of button that pushes easily in between dc stitches but stays secure and doesn't open up afterwards.)
That's it!

Can A Saved Man Choose To Be Lost?


....................
Thank you Toqua's Crafts for Posting Spiky Little Neck Warmer on your site! I went and took a peek and it looks very pretty on you!
Toqua's Crafts


Best Blog Tips